The key to mess-free sensory play isn’t better containment; it’s better understanding of your child’s nervous system.
- Overwhelming, unstructured play leads to chaos. Targeted, “low-load” sensory activities lead to regulation and calm.
- Start with your child’s specific needs (are they seeking or avoiding input?) and use a “sensory ladder” to introduce new textures gradually and safely.
Recommendation: Shift your goal from ‘preventing mess’ to ‘providing regulation’. By doing so, you’ll find the mess naturally decreases as your child’s system becomes more organized.
You see them all over Pinterest and Instagram: beautiful, elaborate sensory bins promising hours of focused, developmental play. You know, instinctively, that this kind of hands-on exploration is exactly what your child needs. But then you look around your small, possibly carpeted, urban apartment, and a wave of anxiety hits. The potential for rice in every crevice, water on the floor, and a full-blown meltdown (from both of you) feels overwhelming. The common advice—”just put a towel down” or “do it in the bathtub”—feels like a flimsy defense against the inevitable chaos.
But what if I told you, as a pediatric occupational therapist, that the secret to mess-free sensory play has almost nothing to do with the mess itself? It’s not about bigger bins or better floor coverings. It’s about understanding the “why” behind the play. The true goal of a sensory bin isn’t just to keep a child busy; it’s to help regulate their nervous system. When an activity is mismatched to a child’s sensory needs, you get overwhelm, which leads to dumping, throwing, and chaos. When it’s correctly matched, you get calm, focus, and deep learning.
In this guide, we will transform you from a stressed-out “mess manager” into a confident “sensory architect.” We’ll move beyond the platitudes and dive into the practical science of sensory regulation. You’ll learn how to identify what your child’s body is truly craving, build targeted sensory experiences with simple kitchen staples, and introduce new textures without triggering a meltdown. Forget the fear of mess; it’s time to unlock the profound, calming benefits of sensory play, even in the coziest of living spaces.
This article provides a structured approach to implementing sensory play that works with your home, not against it. Below is a summary of the key strategies we will explore to make sensory play a peaceful and sustainable part of your routine.
Summary: How to Create Mess-Free Sensory Bins for Small Urban Apartments?
- Why Sensory Play Calms High-Energy Kids Before Bedtime?
- How to Build a Complete Sensory Kit for Under $20 Using Kitchen Staples?
- Sand or Water: Which Medium Is Best for Tactile-Defensive Children?
- The Common Mistake That Turns Sensory Play into a Meltdown
- When to Introduce “Wet” Sensory Play: A Timeline for Toddlers
- Why Some Kids Crave Slime While Others Gag at the Sight of It?
- How to Build a “Peace Corner” That Your Child Actually Wants to Use?
- How to Manage Tactile Experimentation Without Ruining Your Home?
Why Sensory Play Calms High-Energy Kids Before Bedtime?
That burst of “zoomies” your child gets before bed isn’t always a sign of too much energy; often, it’s a sign of a dysregulated nervous system seeking input to organize itself. Instead of trying to suppress that energy, we can channel it. The right kind of sensory play provides targeted input that satisfies the brain’s needs, leading to a state of calm. This is especially true for deep pressure and proprioceptive input, which involve sensations in the muscles and joints.
Think of it as a “regulation ritual” before sleep. Activities that offer deep, calming pressure can be profoundly organizing for a child’s body. An occupational therapist might demonstrate techniques like the “burrito roll” (rolling a child snugly in a blanket), firm “pillow squishes,” or gentle rocking on an exercise ball. These aren’t just games; they are methods of providing the strong proprioceptive and vestibular input that a high-energy child’s nervous system is craving. This input helps release calming neurotransmitters, essentially telling the body it is safe and can power down.
This isn’t just theory; it’s backed by science. In fact, targeted sensory approaches are a cornerstone of occupational therapy. Extensive research confirms that Deep Pressure Therapy (DPT) shows significant reductions in anxiety and physiological markers of stress. By creating a pre-bedtime routine that includes a few minutes of this kind of targeted play, you are not hyping your child up; you are giving their body the precise tools it needs to find stillness and prepare for a restful night.
How to Build a Complete Sensory Kit for Under $20 Using Kitchen Staples?
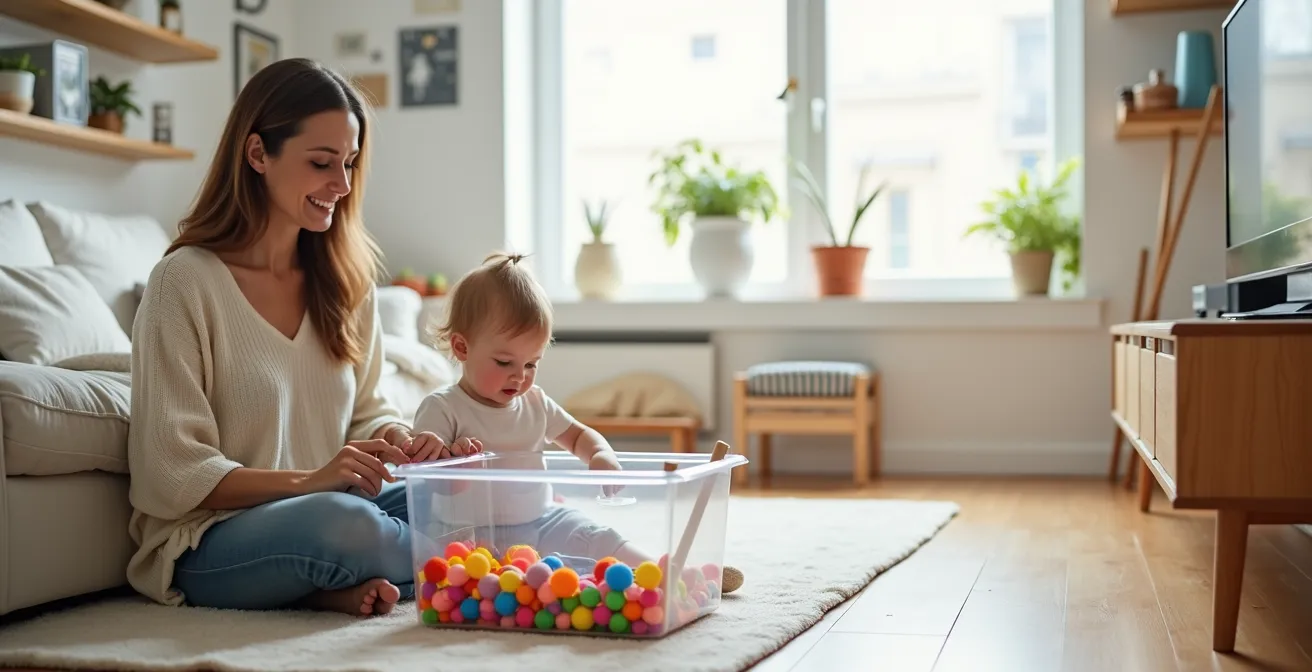
You don’t need expensive, specialized toys to create a powerful sensory experience. In fact, your kitchen pantry is likely already stocked with everything you need to build a versatile, effective, and budget-friendly sensory kit. The goal is to have a “sensory first-aid kit” on hand, allowing you to quickly create a targeted activity that meets your child’s needs at a moment’s notice. This preparation is the first step in shifting from reacting to chaos to proactively designing calm.
This organized approach also helps manage your own anxiety about mess. By having ingredients in designated containers, you’re creating a system of containment-by-design. It signals to both you and your child that this is a structured, special activity, not a free-for-all.

As you see in the image, organizing simple materials can create a sense of order and purpose. Here are a few “recipes” you can prepare using common kitchen staples:
- Cloud Dough: Simply combine 2 cups of flour with about 2 ounces of baby oil (or any kitchen oil). This creates a unique, crumbly-yet-moldable texture that provides wonderful tactile input without the stickiness of play-dough.
- Rainbow Rice: Place a cup of uncooked rice in a ziplock bag, add a few drops of food coloring and a teaspoon of vinegar. Seal the bag, shake vigorously until the color is distributed, and then spread on a tray to air dry. It’s a fantastic, non-sticky filler for bins.
- Mess-Free Oobleck: For a “wet” experience without the spill, mix cornstarch and water in a heavy-duty ziplock bag until it has that magical liquid-solid consistency. Your child can squish and squeeze the bag for goopy fun with zero cleanup.
- Scented Doughs: Add a drop of vanilla extract or a sprinkle of cinnamon to your cloud dough or play-dough to engage the olfactory (smell) system, which has a powerful link to memory and emotion.
Sand or Water: Which Medium Is Best for Tactile-Defensive Children?
For a child who is tactile-defensive—meaning they have an aversive or fearful reaction to certain textures—plunging their hands into a bin of sand or water can be overwhelming and counterproductive. So, the question isn’t “sand or water?” but rather, “what’s the first step on the sensory ladder?” The key is gradual, respectful exposure, allowing the child to be in control.
Occupational therapists recommend a “sensory ladder” approach. Instead of direct hand contact, you start with less threatening interactions. A great first step is tools-only play, where the child can scoop, pour, and interact with a texture using spoons, shovels, or funnels, keeping a safe distance. The next rung on the ladder might be a “dry” version of a wet experience, like a sealed bag containing hair gel and beads. This allows the child to experience the squishy, goopy sensation through a protective barrier. Only after they are comfortable with these steps should you consider open-bin play.
When your child is finally ready for open textures, the choice between sand and water depends on their specific needs. Water is highly adaptable—you can change its temperature, depth, and add bubbles or color. However, its unpredictability (splashing) can be alarming for some. Sand offers a more constant, predictable texture. The following comparison, based on expert recommendations for sensory bins, can help you decide which to introduce first.
| Aspect | Sand | Water |
|---|---|---|
| Controllability | Constant texture, less adaptable | Adjustable temperature, depth, flow |
| Predictability | Highly predictable, no surprises | Can be unpredictable (splashing) |
| Container needs | Deep container recommended | Shallow, clear container initially |
| Sensory ladder approach | Better for intermediate stage | Start with sealed bags of gel first |
| Clean-up difficulty | Moderate (vacuuming needed) | Easy in bathtub setting |
The Common Mistake That Turns Sensory Play into a Meltdown
Many well-intentioned parents have a story like this one, shared by a mom on the popular blog Busy Toddler: “The first time I tried a sensory bin with my son was a disaster. I dumped a giant bag of rice into a plastic container, placed it on the floor… and gave my then 22-month-old this ‘Well, play with it’ kind of look. It didn’t work. At all. He played for about 3 minutes and dumped rice everywhere.” This experience is universal, and it highlights the single biggest mistake parents make: presenting sensory play without structure, boundaries, or clear expectations.
A giant bin of loose material can be incredibly overwhelming for a young child’s brain. Without a clear goal or model for how to interact with it, the “sensory load” becomes too high. The child’s system gets overloaded, and the only way to discharge that chaotic energy is through equally chaotic behavior: throwing, dumping, and running away. This isn’t your child being “naughty”; it’s their nervous system screaming “I’m overwhelmed!”
The antidote is to design the experience with clear rules and rituals from the very beginning. By providing structure, you lower the sensory load and create a feeling of safety, which allows for true exploration and focus. Your role is not just to provide the materials, but to be a co-regulator and a guide.
Your Action Plan: Preventing Sensory Play Meltdowns
- Establish Boundaries: Before play begins, clearly define the play space. Place the bin on a dedicated beach towel or a shower curtain liner. The rule is simple: “The rice stays on the towel.” This creates a visual boundary that is easy for a child to understand.
- Model First, Play Second: Don’t just present the bin. Sit down and play alongside your child for the first few minutes. Model how to scoop, pour, and hide toys in the filler. Your calm engagement is the most important tool.
- Start Small: Don’t fill the bin to the top. Begin with a smaller amount of filler. This is less visually overwhelming and minimizes the potential for a large-scale mess, reducing both your anxiety and your child’s.
- Use “When-Then” Statements: Set clear expectations for continued play. “When you show me you can keep the beans in the bin, then we can add your dinosaur toys.” This empowers the child and links positive behavior to more fun.
- Create a Cleanup Ritual: The activity isn’t over until the cleanup is done. Make it a predictable part of the routine. Have a small dustpan and brush ready. Even a very young child can help sweep up a few stray beans. This teaches responsibility and provides a clear end to the activity.
When to Introduce “Wet” Sensory Play: A Timeline for Toddlers
The allure of water tables and squishy, wet materials is strong, but introducing them too early can lead to safety concerns and major messes. For parents in small spaces, timing is everything. The key is to follow your child’s developmental cues rather than a specific age, but general guidelines can provide a safe and structured timeline. This is another area where the “sensory ladder” concept is your best friend, ensuring a gradual and positive introduction.
First and foremost, safety is paramount. For this reason, experts recommend that toddlers under 2 who are still in the mouthing phase (putting everything in their mouths) should only experience “wet” textures in contained, taste-safe, or supervised ways. Sensory bags (like the mess-free oobleck mentioned earlier) or sealed sensory bottles with water, oil, and glitter are perfect for this stage.
Once your child is past the mouthing phase and can understand simple instructions, you can begin a more direct introduction to wet play. Following a phased approach will build skills and confidence while keeping your home intact.
- Phase 1: The Dedicated Wet Zone (The Bathtub). The bathtub is your best friend. It eliminates all anxiety about spills and mess. Start here. Let your child play with water, yogurt, or edible finger paints in the tub. This is a no-stakes environment to get them comfortable.
- Phase 2: The Comprehension Check. Before moving out of the bathroom, wait until your child can reliably follow a one-step instruction like, “Water stays in the tub.” This is a critical milestone that shows they are beginning to understand boundaries.
- Phase 3: Taste-Safe Bins in Dry Areas. Your first foray out of the bathroom should be with a small bin and taste-safe materials. A shallow bin with a little water and some floating toys, or a bin with edible slime or Jell-O, is a great next step. This should still be on a tiled floor like the kitchen.
- Phase 4: Full Sensory Bins. Only after months of successful, supervised play in the earlier phases should you consider non-taste-safe wet materials (like shaving cream or soap foam) in a bin in a dry area. By this point, your child will have learned the rules and boundaries, and you will be confident in their ability to play constructively.
Why Some Kids Crave Slime While Others Gag at the Sight of It?
Have you ever wondered why one child will dive headfirst into a bucket of slime while their sibling gags at the mere sight of it? This isn’t a matter of being “picky” or “dramatic.” It’s a direct window into their unique sensory processing profile. Every brain registers, interprets, and responds to sensory information differently. Understanding this is key to becoming a “sensory detective” for your own child.
At the simplest level, we can think of two main profiles. A “sensory seeker” has a high neurological threshold; their brain needs a lot of intense input to feel regulated and alert. This is the child who craves big bear hugs, spins in circles, and can’t get enough of sticky, goopy slime. Their system is under-responsive, and they are actively seeking input to “wake it up.” As experts from the Cleveland Clinic note, sensory play can be used to “stimulate a child who might be a little sluggish.”
On the other end is the “sensory avoider” or a child with high sensitivity. Their neurological threshold is very low; even a small amount of input can feel overwhelming and even painful. The texture of slime might feel chaotic and threatening to their nervous system, triggering a fight-or-flight response (gagging, pulling away). Their system is over-responsive, and they are trying to limit input to avoid being overwhelmed. Your job as a parent isn’t to force the avoider to be a seeker, but to respect their system and offer the “just right” challenge using the sensory ladder approach.
How to Build a “Peace Corner” That Your Child Actually Wants to Use?
A “Peace Corner” (or “Calm-Down Corner,” “Cozy Corner”) is not a time-out spot. This is the most crucial rule. A time-out is a punishment that isolates a child when they are emotionally overwhelmed. A peace corner is a safe, pre-established haven filled with tools that help a child self-regulate when they feel their emotions getting too big. It’s a physical space dedicated to creating a low sensory load, offering a retreat from the overwhelming sensations of the world.
The effectiveness of this space hinges on how it’s created and introduced. It must be a place your child *wants* to go to, not a place they are *sent* to. The key is co-creation and positive association. Introduce the corner when your child is calm and happy, exploring the tools together. Let them have a say in what goes in it and what it’s called—”The Fort of Calm” or “The Rocket Ship” is much more inviting than a clinical-sounding name.

The corner itself should be a multi-sensory but low-stimulation environment. Here’s how to build one that works:
- Enclose the Space: Use a small tent, a canopy, or even just a sheet draped over a chair to create a small, den-like feel. This reduces visual input and creates a sense of safety.
- Soften Everything: Fill the space with soft textures—a plush blanket, large pillows to crash into, a fuzzy rug. These provide calming tactile and deep-pressure input.
- Add a Weighted Element: A weighted lap pad or a small weighted stuffed animal can provide incredibly grounding and organizing deep-pressure input.
- Incorporate Gentle Light: Avoid harsh overhead lighting. Instead, use string lights, a bubble tube, or a slow-moving lava lamp to provide gentle, predictable visual input.
- Include Sensory Tools (Not Toys): The items in the corner should be for calming, not stimulating. Think fidget tools, stress balls, scented play-dough, a small bottle of glitter water to shake and watch settle, or headphones to block out noise.
Key takeaways
- The primary goal of sensory play is to help your child’s nervous system regulate; a calm, focused child makes less mess.
- Become a “sensory detective” to understand if your child is seeking or avoiding input, then tailor activities to their specific needs.
- Always use a “sensory ladder” to introduce new or challenging textures, starting with tools or protective barriers before moving to direct contact.
How to Manage Tactile Experimentation Without Ruining Your Home?
We’ve established that the best way to manage mess is to prevent the overwhelm that causes it. By designing structured activities that match your child’s sensory profile, you’ve already won half the battle. Now, let’s talk about the other half: smart, practical containment strategies that work for small spaces. This is where you put on your “sensory architect” hat and design a play environment that is easy to manage and clean, freeing you to enjoy the moment with your child.
The right container is a great place to start. It should be large enough for exploration but not so large it encourages wild, full-body play unless that’s your intention. As a guideline, research suggests providing at least 12 square inches of space per child for them to have adequate room to play. A clear, under-the-bed storage bin is often a perfect choice—it’s shallow enough for easy access but has high enough sides to contain most materials.
Beyond the bin, a few simple tools and rules can make cleanup a breeze and integrate tactile play seamlessly into your home life.
- The Magic Mat: Forget towels that bunch up. Invest in a large, clear vinyl shower curtain liner. It’s inexpensive, provides a huge surface area, has a slightly grippy texture, and can be wiped down, hosed off in the shower, or folded up in seconds.
- The Bin-in-a-Bin Method: Place your primary sensory bin inside a second, larger but shallower container, like a large cookie sheet with a rim or a boot tray. This second layer will catch 90% of the spills and can be easily emptied back into the main bin.
- Location, Location, Location: When possible, move activities to the easiest-to-clean areas like the kitchen floor or bathroom. This simple choice can reduce your cleanup stress by half.
- Empower the Child: Keep a small, child-sized dustpan, broom, and a few rags near the play area. Make “we clean our mess” a non-negotiable, calm end to the activity. This teaches life skills and gives them ownership over the entire process.
By shifting your perspective from fear of mess to the joy of providing regulation, you unlock a powerful tool for connection and development. Start small, observe your child, and trust that you now have the knowledge to create a sensory-rich life that works for your whole family, even in the coziest of apartments. The next step is to simply begin: pick one simple activity, set up your space for success, and watch your child thrive.